Sending Emails with Node.js, Nodemailer, MJML and Amazon SES
A production-ready tech stack for email

Published on
Apr 30, 2024
Read time
14 min read
Introduction
Email is an essential part of the internet today.
In fact, the ability to send messages electronically between computers predates the internet. Despite its age, the technology remains one of the most important, widely-supported ways to communicate digitally. If you’re building software online, email remains an integral part of your toolkit.
However, getting it set up for the first time can be surprisingly tricky.
In this article, we’ll learn how to add this powerful tool to our apps, using some of the best and most popular tools.
This solution is a tried-and-tested tech stack for email in Node.js. It works as a foundation for both simple side projects and large production apps: at my company, we use a very similar setup to send system emails to 100,000s of users every day.
If you’d like to see the final result, check out this repository.
The Problem
In Node.js, working with email can cause more than a few headaches. SMTP, the Simple Mail Transfer Protocol, has more limitations than its modern, webpage-focused counterpart, HTTP.
Then, when it comes to visuals, we’re forced to use a restricted subset of HTML and CSS. This is partly for security reasons and partly — again — due to the age of the technology, and there are plenty of quirks. Want something that looks like a button? You won’t get far with an HTML button element. Instead, you’ll need something like this:
<table
  border="0"
  cellpadding="0"
  cellspacing="0"
  role="presentation"
  style="border-collapse:separate;line-height:100%;"
>
  <tr>
    <td
      align="center"
      bgcolor="#414141"
      role="presentation"
      style="border:none;border-radius:3px;cursor:auto;mso-padding-alt:10px 25px;background:#414141;"
      valign="middle"
    >
      <p
        style="display:inline-block;background:#414141;color:#ffffff;font-family:Ubuntu, Helvetica, Arial, sans-serif;font-size:13px;font-weight:normal;line-height:120%;margin:0;text-decoration:none;text-transform:none;padding:10px 25px;mso-padding-alt:0px;border-radius:3px;"
      >
        Click me!
      </p>
    </td>
  </tr>
</table>
Legacy email providers — namely, Microsoft Outlook —make the situation worse. Because of its large user base, we need to account for Outlook’s individual peculiarities, using vendor-specific code that adds complexity and reduces readability.
And to top it all off, if you’re coming from another language, such as PHP, you might wonder why you need to depend on libraries at all. This is because the web servers, like Apache, usually used to develop PHP come with a sendmail binary built-in. Node.js does not.
If all this sounds a bit intimidating, don’t worry — you’re in the right place! There are plenty of tools available to help guide us past the potential pitfalls, and in this article, I will share an exact blueprint to get email up-and-running painlessly in your Node.js app.
The Solution
With the right set of tools, we can overcome the challenges above. After a bit of upfront effort, the rest should be straightforward.
In this article, the main tools we’ll be using are:
- Nodemailer — the most popular Node.js library for sending email.
- MJML — a framework for making responsive, compatible email designs (plus Handlebars, to support dynamic content in our MJML templates).
- Amazon SES — a cloud-based SMTP server and interface.
To follow along, make sure to download Node.js. We’ll install everything else as we go.
If you like to learn via video, check out my video version of the tutorial below. Otherwise, keep reading!
Alternative Options
A quick note: my chosen tools for this article are popular and battle-tested, but there are good alternatives worth mentioning that might fit your particular needs better. Instead of Nodemailer, check out EmailJS. For responsive frameworks, try Foundation for Emails. To see some alternatives to Handlebars, check out my article on HTML templating systems. Or for cloud-based SMTP providers, there are plenty of other options, including Mailgun and Sendgrid.
Designing Our Email Service
Sometimes, when designing a new library or service, it’s helpful to start by imagining what the code should look like that uses said library or service.
I want to set things up so that, when writing the code to send a new email, we’re worrying about the bare minimum. So how about something simple, like this?
await email.onboarding.send("jane.doe@example.com", variables, options);
I’m imagining information like from, subject, cc, bcc, attachments and html can all be set on a per-template basis. If for some reason we need to override these, we can do so in options.
So we only want to specify the person who the email will be sent to — the to value— and any other dynamic content can be added as part of our variables object. For example:
await email.referral.send(
  "john.smith@example.com",
  {
    firstName: "John",
    referrer: {
      firstName: "Jane",
      lastName: "Doe",
    },
    loginUrl: "[https://example.com/login](https://example.com/login)",
    features: [
      { title: "Feature 1", description: "Description 1" },
      { title: "Feature 2", description: "Description 2" },
      { title: "Feature 3", description: "Description 3" },
    ],
  },
  options
);
Another constraint on our system is that, in order to get the benefits of syntax highlighting, formatting, and so on, we’ll want to keep our MJML templates in their own .mjml files.
I also want to minimise the amount of work we need to do each time we add a new email template. To that end, we can write the send function once inside a base class and extend our individual emails from that. Then we only have to specify a few specific details for the given email, like so.
export class ReferralEmail extends BaseEmailReferralEmailVariables {
  constructor() {
    super({
      from: "hello@example.com",
      subject: ({ referrer }: ReferralEmailVariables) =>
        `You’ve been referred to Example.com by ${referrer.firstName}!`,
      template: path.join(__dirname, "template.mjml"),
    });
  }
}
It would be useful to pass variables into our subject, so let’s expect a callback function there instead of just a plain string.
Now we know what we’re aiming for, let’s start coding!
Project Setup
We’ll start a new directory for our application.
mkdir nodejs-nodemailer-tutorial
cd nodejs-nodemailer-tutorial
Once inside, we can initialise a new Node.js project.
npm init -y
Then, we can install dependencies for all the tools discussed above.
npm i @aws-sdk/client-ses handlebars mjml nodemailer
I’m choosing to use TypeScript as I believe this is now standard in the world of JavaScript servers for most production-grade projects, so I’ll add a basic boilerplate tsconfig.json file.
{
  "compilerOptions": {
    "target": "es2016",
    "module": "commonjs",
    "esModuleInterop": true,
    "forceConsistentCasingInFileNames": true,
    "strict": true,
    "skipLibCheck": true
  }
}
We’ll also need some additional dev dependencies to run TypeScript and add types to certain of our libraries:
npm i -D @types/mjml @types/nodemailer nodemon ts-node typescript
Finally, let’s go into our package.json so we can point "main" to src/index.ts and add a simple script to run our application.
{
  "main": "src/index.ts",
  "scripts": {
    "start": "ts-node src/index.ts"
  }
}
The Transporter
First, let’s create a transporter — a client we can use to send our mail. In production, we’ll use Amazon SES. But in development, we’ll use a mailcatcher called Ethereal to give us a preview of our emails without actually sending anything. I’ll use the SES version when NODE_ENV is set to "production".
We’ll do this in a file called transporter.ts inside src/services/email.
// src/services/email/transporter.ts

import * as nodemailer from "nodemailer";
import * as aws from "@aws-sdk/client-ses";

function getTransporter() {
  if (process.env.NODE_ENV === "production") {
    const ses = new aws.SES({
      apiVersion: "2010-12-01",
      region: "eu-west-2",
      credentials: {
        accessKeyId: process.env.AWS_ACCESS_KEY_ID ?? "",
        secretAccessKey: process.env.AWS_SECRET_ACCESS_KEY ?? "",
      },
    });

    return nodemailer.createTransport({
      SES: { ses, aws },
    });
  } else {
    return nodemailer.createTransport({
      host: "smtp.ethereal.email",
      port: 587,
      secure: false,
      auth: {
        user: "maddison53@ethereal.email",
        pass: "jn7jnAPss4f63QBp6D",
      },
    });
  }
}

export const transporter = getTransporter();
The Base Email
Since a lot of functionality is going to be shared between emails, we can benefit from a base class that our individual emails classes can extend from.
First, we’ll build a constructor, featuring the elements that are specific to each email and unlikely to change depending on who the email will be sent to.
// src/services/email/base.ts

export abstract class BaseEmailT {
  protected from: string;
  protected subject: string | ((variables: T) => string);
  protected template: string;

  constructor({
    from,
    subject,
    template,
  }: {
    from: string;
    subject: string | ((variables: T) => string);
    template: string;
  }) {
    this.from = from;
    this.subject = subject;
    this.template = template;
  }
}
Note that, for subject, we’re supporting either a simple string type or a callback function, that allows us to pass in dynamic variables. We can enable an interface featuring the dynamic variables to be passed to each email using the generic type T.
Next, lets create a generic send function. It’ll take three arguments:
to— the email address we want to send the email to.variables— any dynamic variables that will go into our email templates.options— an optional field, allowing us to pass arguments directly to the underlying library and override preset fields likefromandsubject.
We’ll also want to asynchronously read files, using Node’s fs (filesystem) library. We’ll then compile them using Handlebars, allowing us to pass in dynamic variables. And finally, we’ll convert that compiled code from MJML to HTML.
All-in-all, our send function could look something like this:
// src/services/email/base.ts

import fs from "fs/promises";
import path from "path";
import mjml2html from "mjml";
import * as nodemailer from "nodemailer";
import * as handlebars from "handlebars";
import { transporter } from "./transporter";

export abstract class BaseEmailT {
  // code unchanged

  public async send(
    to: string,
    variables: T,
    options?: nodemailer.SendMailOptions
  ) {
    const mjml = await fs.readFile(this.template, "utf-8");
    const html = mjml2html(handlebars.compile(mjml)(variables)).html;

    await transporter
      .sendMail({
        to,
        from: this.from,
        subject:
          typeof this.subject === "string"
            ? this.subject
            : this.subject(variables),
        html,
        ...options,
      })
      .then((info) => {
        console.info("Message sent: ", info.messageId);

        const previewUrl = nodemailer.getTestMessageUrl(info);
        if (previewUrl) {
          console.info("Preview URL: ", previewUrl);
        }
      });
  }
}
Templates
We’re ready to start coding our templates. We’ll keep the styling extremely simple, as I’m focused on showing you how to make your emails work — I’ll leave the beautification to you!
Inside the src/email folder, we’ll create a templates folder, and inside that, we’ll create a folder for each of our templates: one for onboarding and one for referral.
/email/
└── /templates/
    ├── /onboarding/
    │   ├── template.mjml
    │   └── index.ts
    └── /referral/
        ├── template.mjml
        └── index.ts
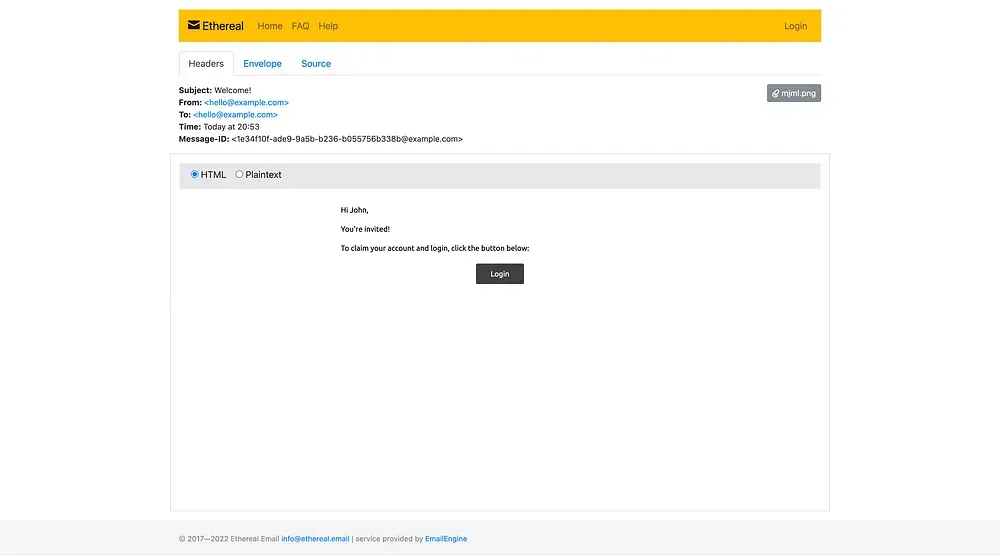
Let’s start with onboarding. Here’s a basic template, where we use double curly-braces for the dynamic values.
<mjml>
  <mj-body>
    <mj-section>
      <mj-column>
        <mj-text>Hi {{firstName}},</mj-text>
        <mj-text>You’re invited!</mj-text>
        <mj-text
          >To claim your account and login, click the button below:</mj-text
        >
        <mj-button href="{{loginUrl}}">Login</mj-button>
      </mj-column>
    </mj-section>
  </mj-body>
</mjml>
And here’s the index.ts file, where we’ll extend the BaseEmail and provide a type for the dynamic values.
// src/services/email/templates/onboarding/index.ts

import path from "path";
import { BaseEmail } from "../../base";

interface OnboardingEmailVariables {
  firstName: string;
  loginUrl: string;
}

export class OnboardingEmail extends BaseEmailOnboardingEmailVariables {
  constructor() {
    super({
      from: "hello@example.com",
      subject: "Welcome!",
      template: path.join(__dirname, "template.mjml"),
    });
  }
}
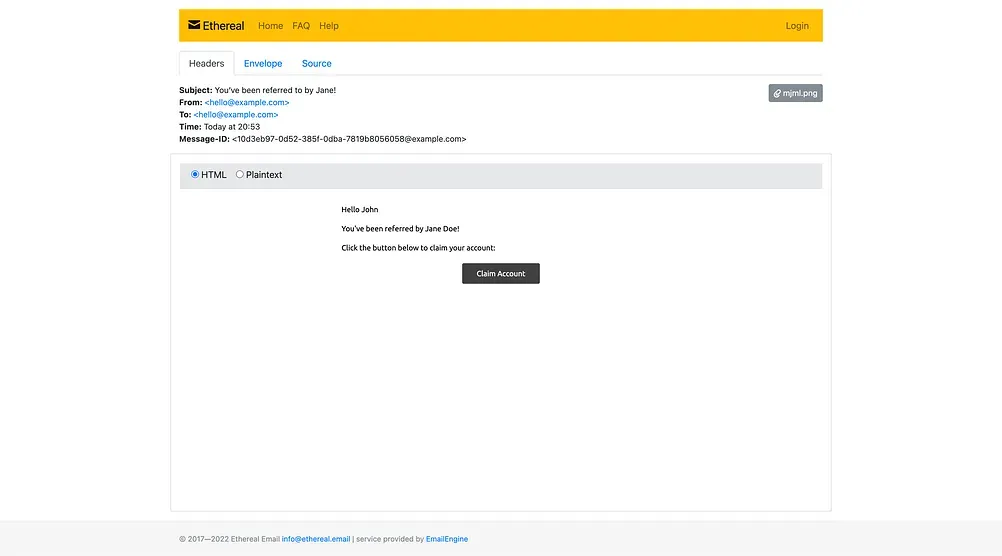
Similarly, for the referral email, we’ll start with the template.
<mjml>
  <mj-body>
    <mj-section>
      <mj-column>
        <mj-text>Hello {{firstName}}</mj-text>
        <mj-text
          >You've been referred by {{referrer.firstName}}
          {{referrer.lastName}}!</mj-text
        >
        <mj-text>Click the button below to claim your account:</mj-text>
        <mj-button href="{{loginUrl}}">Claim Account</mj-button>
      </mj-column>
    </mj-section>
  </mj-body>
</mjml>
The main difference, in the index.ts file, is that we’re using a callback for the subject, so we can pass in one of our variables:
// src/services/email/templates/referral/index.ts

import path from "path";
import { BaseEmail } from "../../base";

interface ReferralEmailVariables {
  firstName: string;
  referrer: {
    firstName: string;
    lastName: string;
  };
  loginUrl: string;
}

export class ReferralEmail extends BaseEmailReferralEmailVariables {
  constructor() {
    super({
      from: "hello@example.com",
      subject: ({ referrer }: ReferralEmailVariables) =>
        `You’ve been referred by ${referrer.firstName}!`,
      template: path.join(__dirname, "template.mjml"),
    });
  }
}
The Email Service
Now we have our emails, we can organise them by putting them inside an EmailService class.
// src/services/email/index.ts

import { OnboardingEmail } from "./templates/onboarding";
import { ReferralEmail } from "./templates/referral";

class EmailService {
  onboarding = new OnboardingEmail();
  referral = new ReferralEmail();
}

export const email = new EmailService();
We’ll export an instance of this class, and all that’s left is to call it. Back in our root folder, in the index.ts file, we can run our code.
// src/index.ts

import { email } from "./services/email";

(async () => {
  await email.onboarding.send("hello@example.com", {
    firstName: "John",
    loginUrl: "[https://example.com/login](https://example.com/login)",
  });

  await email.referral.send("hello@example.com", {
    firstName: "John",
    referrer: {
      firstName: "Jane",
      lastName: "Doe",
    },
    loginUrl: "[https://example.com/login](https://example.com/login)",
  });
})();
Try running npm run start and you should see something like this:
Message sent:  1e34f10f-ade9-9a5b-b236-b055756b338c@example.com
Preview URL:  [https://ethereal.email/message/ZZABwUTysrzrX0uFZiljRHmZCxl5ALPOAAAZLGix6mmECSA36QvgxQPuruZ](https://ethereal.email/message/ZZABwUTysrzrX0uFZiljRHmZCxl5ALPOAAAZLGix6mmECSA36QvgxQPuruZ)
Message sent:  10d3eb97-0d52-385f-0dba-7819b8056059@example.com
Preview URL:  [https://ethereal.email/message/ZZABwUTysrzrX0uFZiljRHmZCxl5ALPmAAAZLVgBuae2mBoIlWzH36NRuKV](https://ethereal.email/message/ZZABwUTysrzrX0uFZiljRHmZCxl5ALPmAAAZLVgBuae2mBoIlWzH36NRuKV)
Open up the preview URLs, and we can see our (very minimalist) designs!
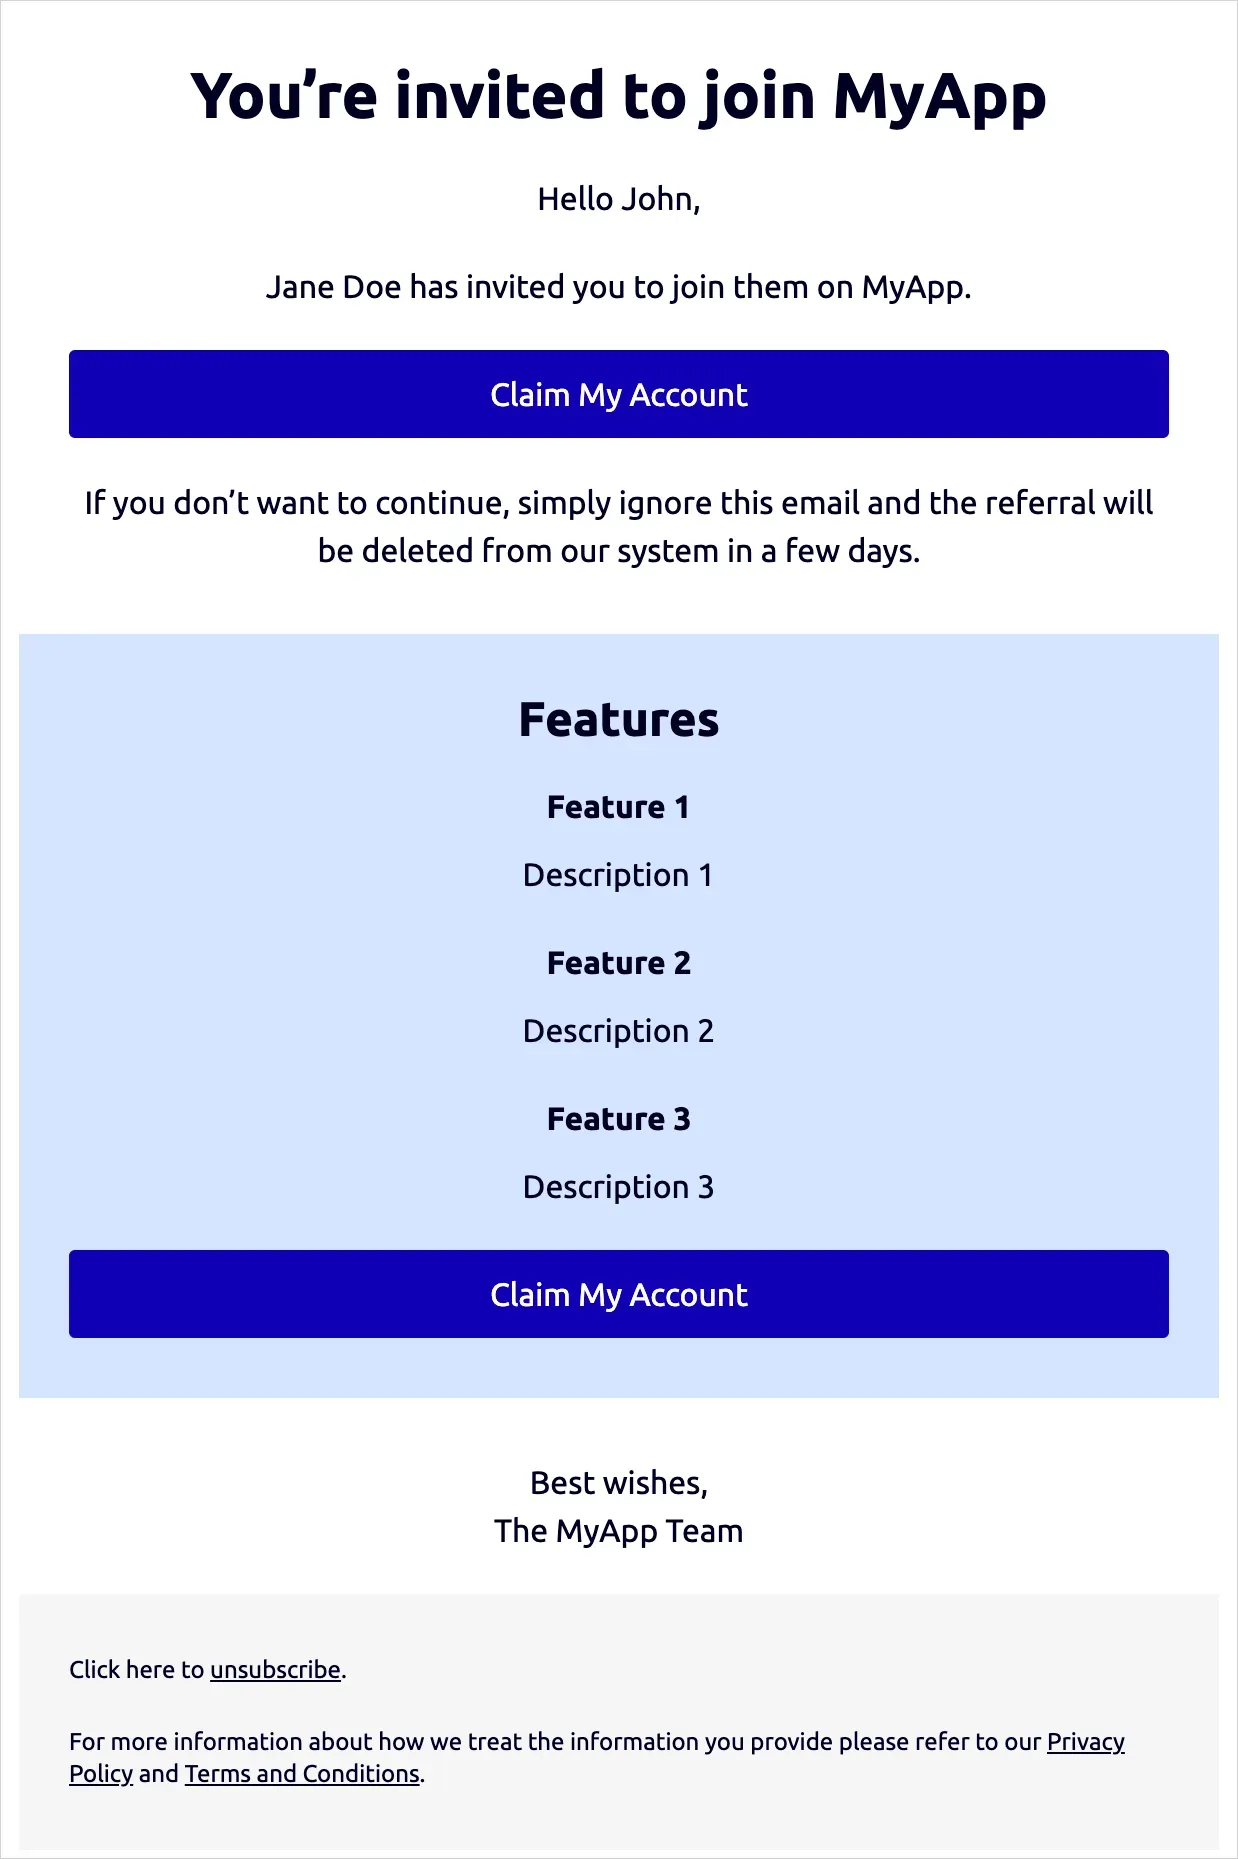
Taking the Design Further
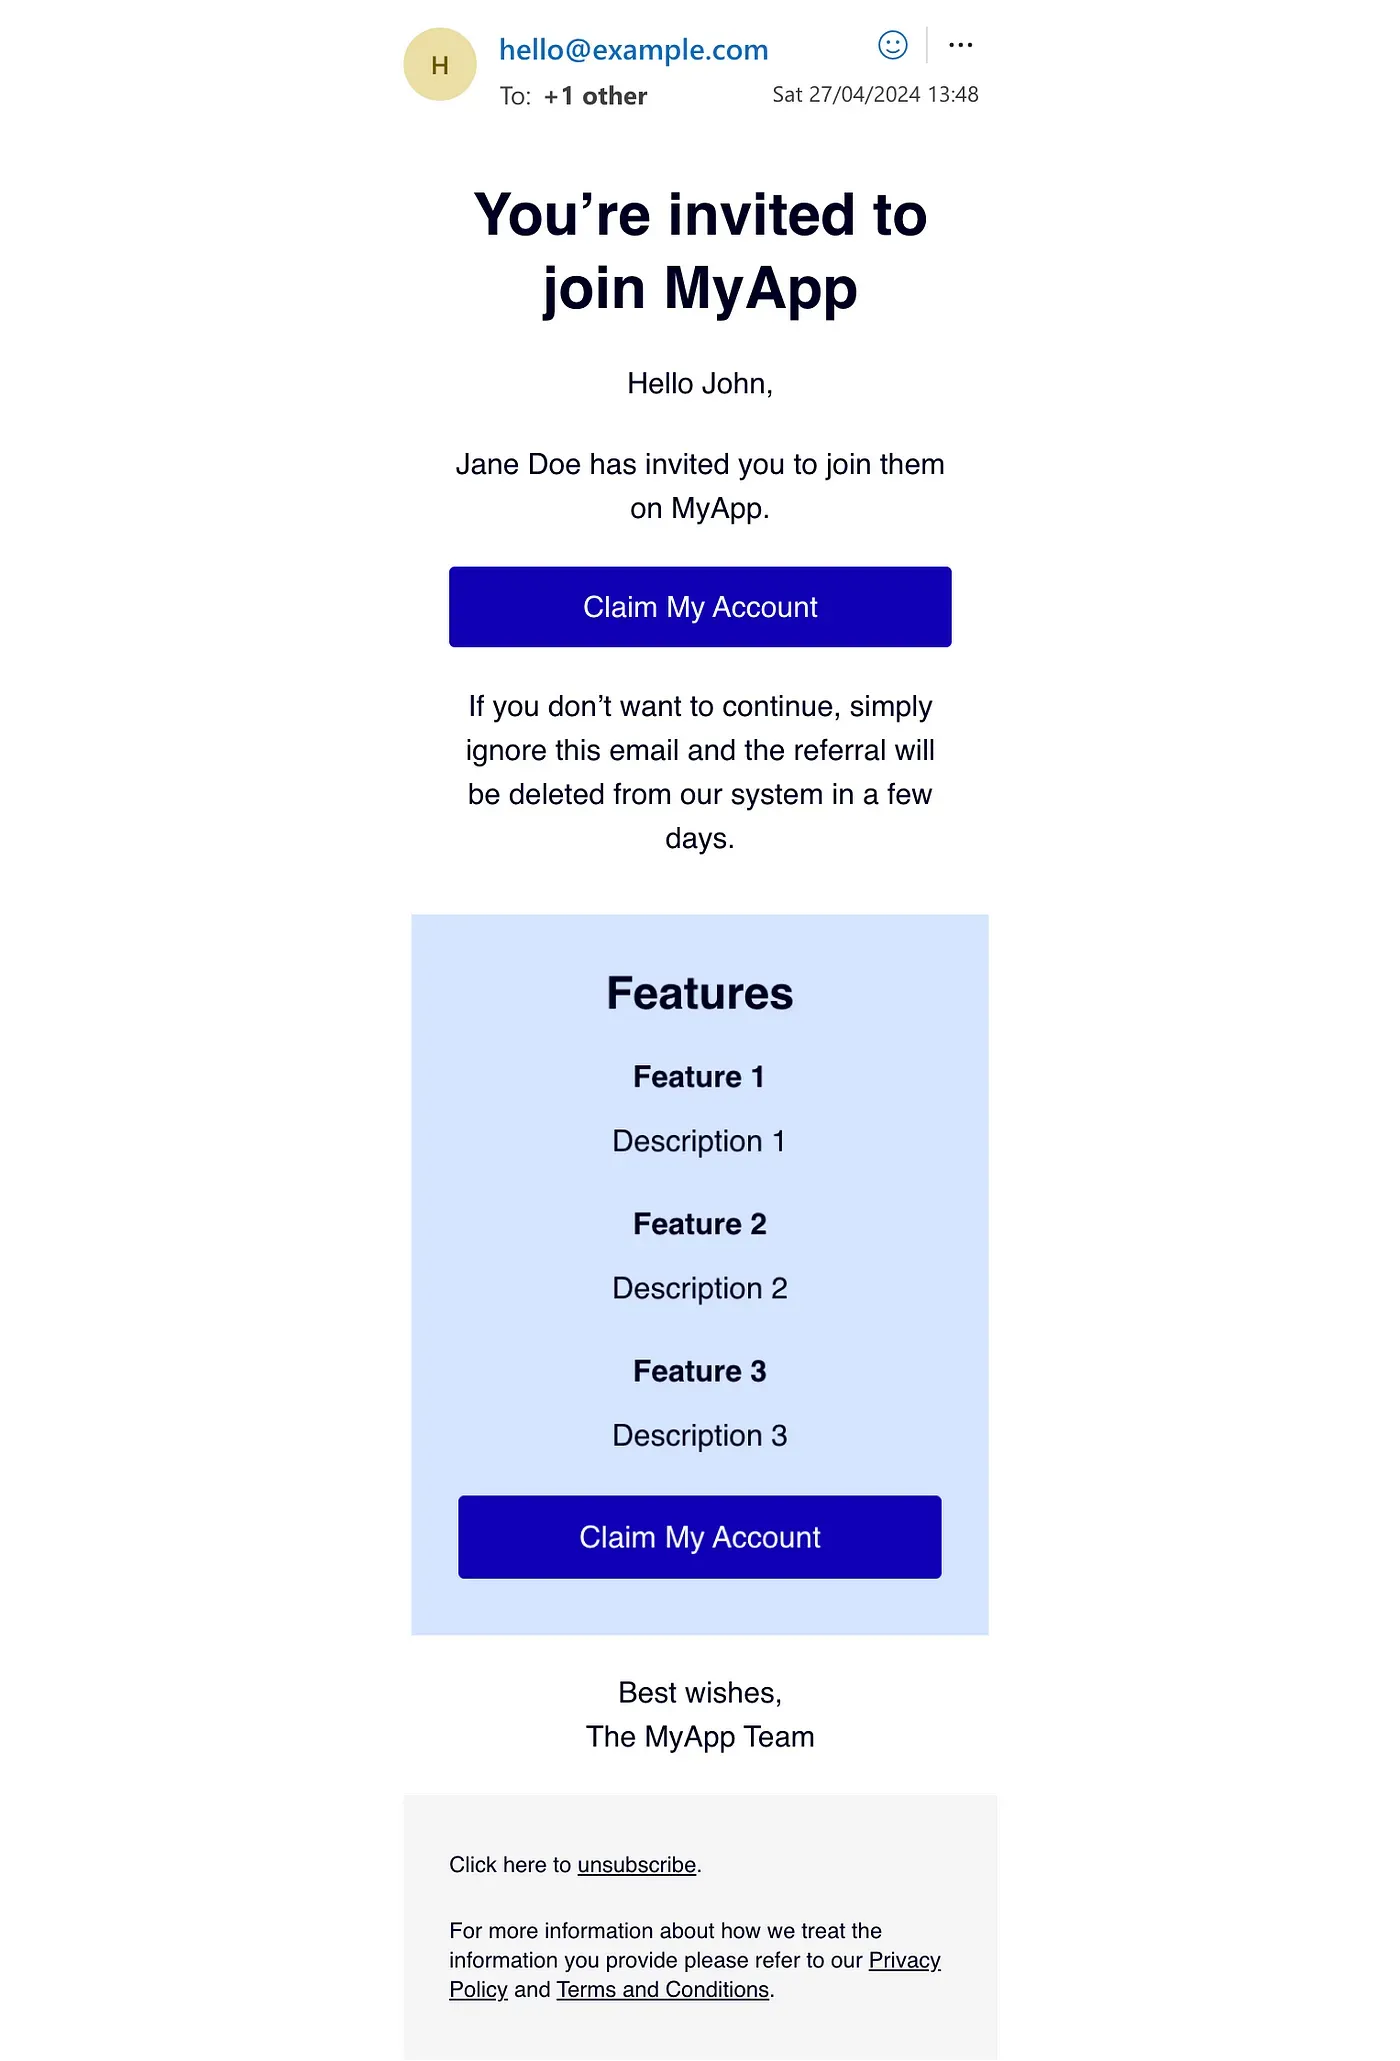
To demonstrate some of the benefits of MJML and Handlebars, let’s improve our referral email with an updated design and more dynamic content.
Here’s the design we’ll be working towards:
We know we’ll need a lot of text components and two buttons, so we can set default styles for these using the mjml-head component:
<mjml>
  <mj-head>
    <mj-attributes>
      <mj-text
        font-size="16px"
        line-height="24px"
        color="#002"
        align="center"
      />
      <mj-button
        font-size="16px"
        line-height="24px"
        width="100%"
        background-color="#1000B6"
      />
    </mj-attributes>
  </mj-head>
</mjml>
We want our features section to be dynamic, so let’s leave that for last. For now, we can fill in the rest of the static MJML:
<mjml>
  <mj-head>
    <!-- code unchanged -->
  </mj-head>
  <mj-body>
    <mj-section>
      <mj-column>
        <mj-text font-size="32px" font-weight="bold" line-height="40px"
          >You’re invited to join MyApp</mj-text
        >
        <mj-text>Hello {{firstName}},</mj-text>
        <mj-text
          >{{referrer.firstName}} {{referrer.lastName}} has invited you to join
          them on MyApp.</mj-text
        >
        <mj-button width="100%" background-color="#1000B6" href="{{loginUrl}}"
          >Claim My Account</mj-button
        >
        <mj-text
          >If you don’t want to continue, simply ignore this email and the
          referral will be deleted from our system in a few days.</mj-text
        >
      </mj-column>
    </mj-section>

    <mj-section>
      <mj-column>
        <mj-text padding-bottom="0">Best wishes,<br />The MyApp Team</mj-text>
      </mj-column>
    </mj-section>

    <mj-section background-color="#F5F5F5">
      <mj-column>
        <mj-text font-size="12px" line-height="16px" align="left"
          >Click here to
          <a
            href="https://example.com"
            style="text-decoration: underline; color: #002;"
            >unsubscribe</a
          >.</mj-text
        >
        <mj-text font-size="12px" line-height="16px" align="left"
          >For more information about how we treat the information you provide
          please refer to our
          <a
            href="https://example.com"
            style="text-decoration: underline; color: #002;"
            >Privacy Policy</a
          >
          and
          <a
            href="https://example.com"
            style="text-decoration: underline; color: #002;"
            >Terms and Conditions</a
          >.</mj-text
        >
      </mj-column>
    </mj-section>
  </mj-body>
</mjml>
Finally, we’ll build the features section. Handlebars gives us the ability to do conditional and looping logic inside our template. So we can make sure we only show the features section if we have at least one feature, and we can support an arbitrary number of features by looking through them. Here’s how that block of code might look:
{{#if features.length}}
<mj-section background-color="#D5E5FE">
  <mj-column>
    <mj-text font-size="24px" font-weight="bold">Features</mj-text>
    {{#each features}}
    <mj-text font-weight="bold" padding-bottom="0">{{this.title}}</mj-text>
    <mj-text>{{this.description}}</mj-text>
    {{/each}}
    <mj-button width="100%" background-color="#1000B6" href="{{loginUrl}}"
      >Claim My Account</mj-button
    >
  </mj-column>
</mj-section>
{{/if}}
To add type support for these new fields, we’ll need to adjust our ReferralEmailVariables interface back in src/email/templates/referral/index.ts.
interface ReferralEmailVariables {
  firstName: string;
  referrer: {
    firstName: string;
    lastName: string;
  };
  loginUrl: string;
  features?: {
    title: string;
    description: string;
  }[];
}
Then, to get an email that looks exactly like the image above, we can call our send function with the following arguments:
await email.referral.send(
  "hello@example.com",
  {
    firstName: "John",
    referrer: {
      firstName: "Jane",
      lastName: "Doe",
    },
    loginUrl: "[https://example.com/login](https://example.com/login)",
    features: [
      { title: "Feature 1", description: "Description 1" },
      { title: "Feature 2", description: "Description 2" },
      { title: "Feature 3", description: "Description 3" },
    ],
  },
  {}
);
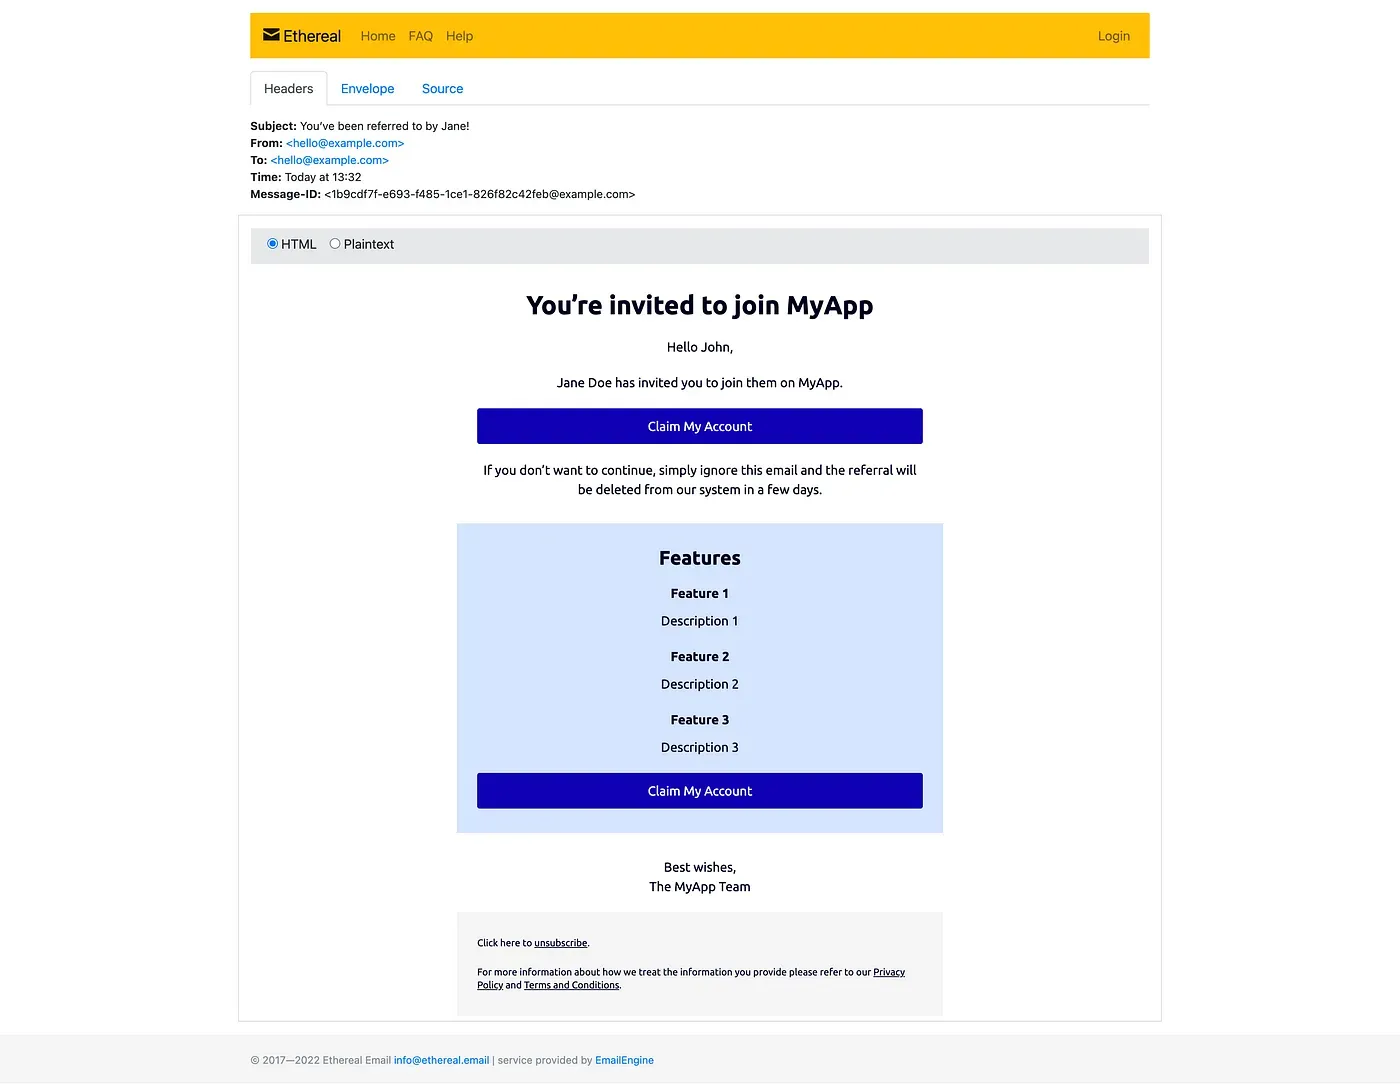
Here’s how that looks in an Ethereal preview page.
And the ultimate test — Outlook, on mobile.
The ultimate test of an email design — does it look good in Outlook on mobile?
Thanks to MJML, our email is responsive and even looks good in Outlook!
With that, we’ve come to the end of the coding portion of this tutorial. To see the final result, check out this repo:
Lastly, I’ll share some advice on how to get started with Amazon SES and send emails in production.
Amazon SES
What about production? As mentioned above, there are other options like Mailgun and Sendgrid. I’m using AWS as I already use other AWS products, and it’s easy to keep everything in one place.
If you’re new to AWS, it can be intimidating. But SES, the Simple Email Service, is certainly one of the more straightforward products on AWS.
You’ll need to set up an account and get credentials: at the very least, an AWS_ACCESS_KEY_ID and an AWS_SECRET_ACCESS_KEY. For help with this step, check out the official AWS documentation.
In the transporter.ts file, I have added these to my environment variables. However you choose to expose these, make sure, of course, to avoiding committing them to version control.
Once you’ve signed in to the AWS console, search for Amazon SES and click “Get set up”.
There are three required steps for sending email. You’ll need a custom domain and a custom email — often, your domain’s hosting provider will also provide an email plan. (For help settings this up, try searching for custom email domains on your hosting provider’s site: see, for example, this guide by GoDaddy or this one by Hostinger).

To verify you own the domain, you’ll need to add several DNS records, which will also be possible via your hosting provider. Until you’ve done this, any emails you send will tell receivers that they come “via amazonses.com”, which typically comes with a warning — as the from address and the actual origin do not match!

Once you’ve done verified the email address and the domain, the code we wrote above should run!
NODE_ENV=production npm run start
However, you’ll only be able to send emails to valid identities, which — to begin with — will just be the email you verified.
To go public and send emails to anyone you choose, you need to submit a “production access request”. This will require a link to your website and an explanation of what emails you’ll be sending.
This is primarily to ensure responsible usage and prevent the abuse of the service, by, for example, sending spam emails, as this could harm the reputation of AWS as an email service provider. If they didn’t take precautionary steps to block bad actors, Internet Service Providers (ISPs) and email services could start blocking emails coming from AWS SES, and this would affect all users of the service, not just the ones misusing it.
Because of this, AWS want a detailed plan for your intended email usage, including:
- how often you send email,
- how you maintain your recipient lists, and
- how you manage bounces, complaints, and unsubscribe requests.
They may even ask to see example email designs.
Until you’re approved, you’ll be in sandbox mode, with a more limited daily sending quota. But that should be more than enough while you’re still developing!

What it looks like when you’re in sandbox mode, with a pending request for production access
Once approved, you can move out of the sandbox, up your quota and send emails to anyone. After providing a detailed explanation of the email usage in my app — as well as an example design and strategies to keep my reputation metrics high — I was granted production access and a daily sending quota of 50,000 emails per day.

What it looks like once production access has been granted
Further Resources
There’s a lot more to learn about each of the tools used in this article, and the best place to start is the official website of each:
- Nodemailer — https://www.nodemailer.com/
- MJML — https://mjml.io/
- Handlebars — https://handlebarsjs.com/
- Amazon SES — https://aws.amazon.com/ses/
In particular, I recommend checking out MJML’s list of responsive email templates to see some more interesting designs, featuring images, multi-column layouts and more. Or try creating a custom MJML component, which can be great for repeated elements like headers and footers.
And that’s a wrap. Happy emailing!
If you have any questions, feedback or other resources to share, please leave a comment!
Addendum: Next.js
To get this solution working nicely in Next.js, where I’m using it, requires a few additional tweaks. This is because Next.js runs on both the client and the server, and we need to ensure our server-only code does not run on the client.
Often, this is straightforward. But because our dependencies don’t actually work on the client we need to make adjustments to prevent our build from failing. (Handlebars does have a handlebars/runtime version, which would work, but as MJML doesn’t, we need a different workaround).
First, let’s add in a warning to out send function to prevent maintainers from calling this on the client. We can use typeof window to determine whether we are on the client or not.
public async send(
  to: string,
  variables: T,
  options?: nodemailer.SendMailOptions,
) {
  if (typeof window !== "undefined") {
    throw new Error(
      "You cannot send an email in the browser. Please use the server.",
    );
  }

  // code unchanged
}
Next, we can use dynamic imports to ensure that the server-only dependencies are only loaded when the send function is called. So delete the imports of "mjml" and "handlebars" at the top of the file and move them into the send function, like so:
public async send(
  to: string,
  variables: T,
  options?: nodemailer.SendMailOptions,
) {
  if (typeof window !== "undefined") {
    throw new Error(
      "You cannot send an email in the browser. Please use the server.",
    );
  }

  const mjml2html = (await import("mjml")).default;
  const handlebars = (await import("handlebars")).default;

  const mjml = await fs.readFile(this.template, "utf-8");
  const html = mjml2html(handlebars.compile(mjml)(variables)).html;

  // code unchanged
}
Finally, we’ll need to make some alterations to our Webpack configuration to exclude those dependencies on the client. My version of Next.js is 14, which means we’re using Webpack 5.
We can use the isServer boolean, together with the Webpack IgnorePlugin to remove Handlebars and MJML from the build on the client. Our build will still show warnings, though, so we can suppress these using config.ignoreWarnings.
So head over to next.config.js (or next.config.mjs ) and add the following options to your webpack configurations.
  webpack: ((config, { isServer, webpack }) => {
    // on the client, ignore handlebars and mjml
    if (!isServer) {
      config.plugins.push(new webpack.IgnorePlugin({
        resourceRegExp: /^(handlebars|mjml)$/
      }));
    }

    // despite the above, we still need to suppress warnings for ignored dependencies
    config.ignoreWarnings = [
      { module: /handlebars/ },
      { module: /mjml/ },
    ];

    return config;
  }),
One final note. In Next.js, you’ll likely need to use process.cwd() instead of __dirname to correctly locate the path of your templates. So in your OnboardingEmail class, your template might look something like this:
template: path.join(
  process.cwd(),
  "src/server/services/email/templates/onboarding/",
  "template.mjml",
),
Would life be simpler with dedicated Node.js server? Possibly! But it does feel good to get everything working, albeit after a bit of a struggle!
Related articles
You might also enjoy...

Switching to a New Data Structure with Zero Downtime
A Practical Guide to Schema Migrations using TypeScript and MongoDB
7 min read
Feb 2025
How to Automate Merge Requests with Node.js and Jira
A quick guide to speed up your MR or PR workflow with a simple Node.js script
7 min read
Nov 2024
Automate Your Release Notes with AI
How to save time every week using GitLab, OpenAI, and Node.js
11 min read
Nov 2024