Create Interactive Visuals with JavaScript and HTML5 Canvas
How to Make Two Animated, Interactive Hero Sections

Published on
Sep 27, 2019
Read time
12 min read
Introduction
Making an eye-catching, memorable website isn’t easy. As the quality and performance of the web has gone up, so have users’ expectations. One of the best ways to make a lasting impression is through animated, interactive visual elements.
Since the canvas tag got updated in HTML, there are now lots of powerful ways to bring interactive visuals to your next web app. In this tutorial, we’ll look into how, by building two different interactive hero sections, pictured below.

In the first section, we’ll look into the boilerplate code that is common to both examples. Then, we’ll go into the details of each effect. In roughly 100 lines of JavaScript, you can produce eye-catching, interactive visuals like these!
Introduction: The Code in Both Examples
It’s tempting to go straight into the visuals, but there’s a lot of shared code we’ll use in for all three interactive hero images. For that reason, I’ve chosen to begin with the shared elements. If you’d prefer to go straight to the visuals, you can copy this boilerplate code and skip to the next section!
HTML
The necessary HTML code is the usual boilerplate, plus a canvas element. For convenience, feel free to copy and paste the following code:
<!DOCTYPE html>
<html lang="en">
  <head>
    <meta charset="UTF-8" />
    <meta name="viewport" content="width=device-width, initial-scale=1.0" />
    <meta http-equiv="X-UA-Compatible" content="ie=edge" />

    <title>Canvas</title>

    <link rel="stylesheet" type="text/css" href="style.css" />
    <script type="text/javascript" src="canvas.js" async></script>
  </head>

  <body>
    <canvas></canvas>
  </body>
</html>
CSS
To begin with, this is the only CSS we need. Feel free to include it inside style tags in index.html or in a separate style.css file:
body {
  margin: 0;
  overflow-x: hidden;
}
From now on, we’ll be focusing on our JavaScript file, canvas.js.
Canvas
We’ll start with the elements that are repeated across the three different examples. Whenever we use HTML5 canvas, we need to get our canvas tag from the DOM and pass it the appropriate context (in our case '2d' ):
const cvs = document.querySelector("canvas");
const c = cvs.getContext("2d");
Next, we want to our canvas to fill the entire window:
cvs.width = window.innerWidth;
cvs.height = window.innerHeight;
Events
Because we’re using JavaScript, we need to take an extra step to ensure that the canvas adapts to fit the window whenever we resize the browser. To do this, we can add an event listener:
window.addEventListener("resize", function () {
  cvs.width = window.innerWidth;
  cvs.height = window.innerHeight;
});
The interactivity in this tutorial will be based around mouse movements. We can track the mouse’s position by creating a global mouse object and another event listener, like so:
let mouse = {
  x: undefined,
  y: undefined,
};

window.addEventListener("mousemove", function (e) {
  mouse.x = event.x;
  mouse.y = event.y;
});
Classes
If we ever need to use a shape more than once, it’s helpful to define it as a class. This generic Shape class can be extended to
class Shape {
  constructor(x, y) {
    this.x = x;
    this.y = y;
    this.initialX = x;
    this.initialY = y;
  }

  draw = () => {
    // this is where we control the shape's appearance
  };

  update = () => {
    // this is where we control movement and interactivity
    this.draw();
  };
}
Animation
Finally, we’ll need an animation function that calls itself repeatedly using requestAnimationFrame. In most situations, we’ll want to completely clear the canvas between each render, which can be done using c.clearRect as below:
function animate() {
  requestAnimationFrame(animate);
  c.clearRect(0, 0, window.innerWidth, window.innerHeight);
  // this is where we call our animation methods, such as Shape.draw()
}

animate();
The Complete Boilerplate
Once you’ve added in all the boilerplate, you should end up with something like this. We’ll be using the code below as the starting point for each of the three examples. Place it in a file called canvas.js:
const cvs = document.querySelector("canvas");
const c = cvs.getContext("2d");

cvs.width = window.innerWidth;
cvs.height = window.innerHeight;

window.addEventListener("resize", function () {
  cvs.width = window.innerWidth;
  cvs.height = window.innerHeight;
});

let mouse = {
  x: undefined,
  y: undefined,
};

window.addEventListener("mousemove", function (e) {
  mouse.x = event.x;
  mouse.y = event.y;
});

class Shape {
  constructor(x, y) {
    this.x = x;
    this.y = y;
    this.initialX = x;
    this.initialY = y;
  }

  draw = () => {
    // this is where we control the shape's appearance
  };

  update = () => {
    // this is where we control movement and interactivity
    this.draw();
  };
}

function animate() {
  requestAnimationFrame(animate);
  c.clearRect(0, 0, window.innerWidth, window.innerHeight);

  /* this is where we call our animation methods, such as
  Shape.draw() */
}

animate();
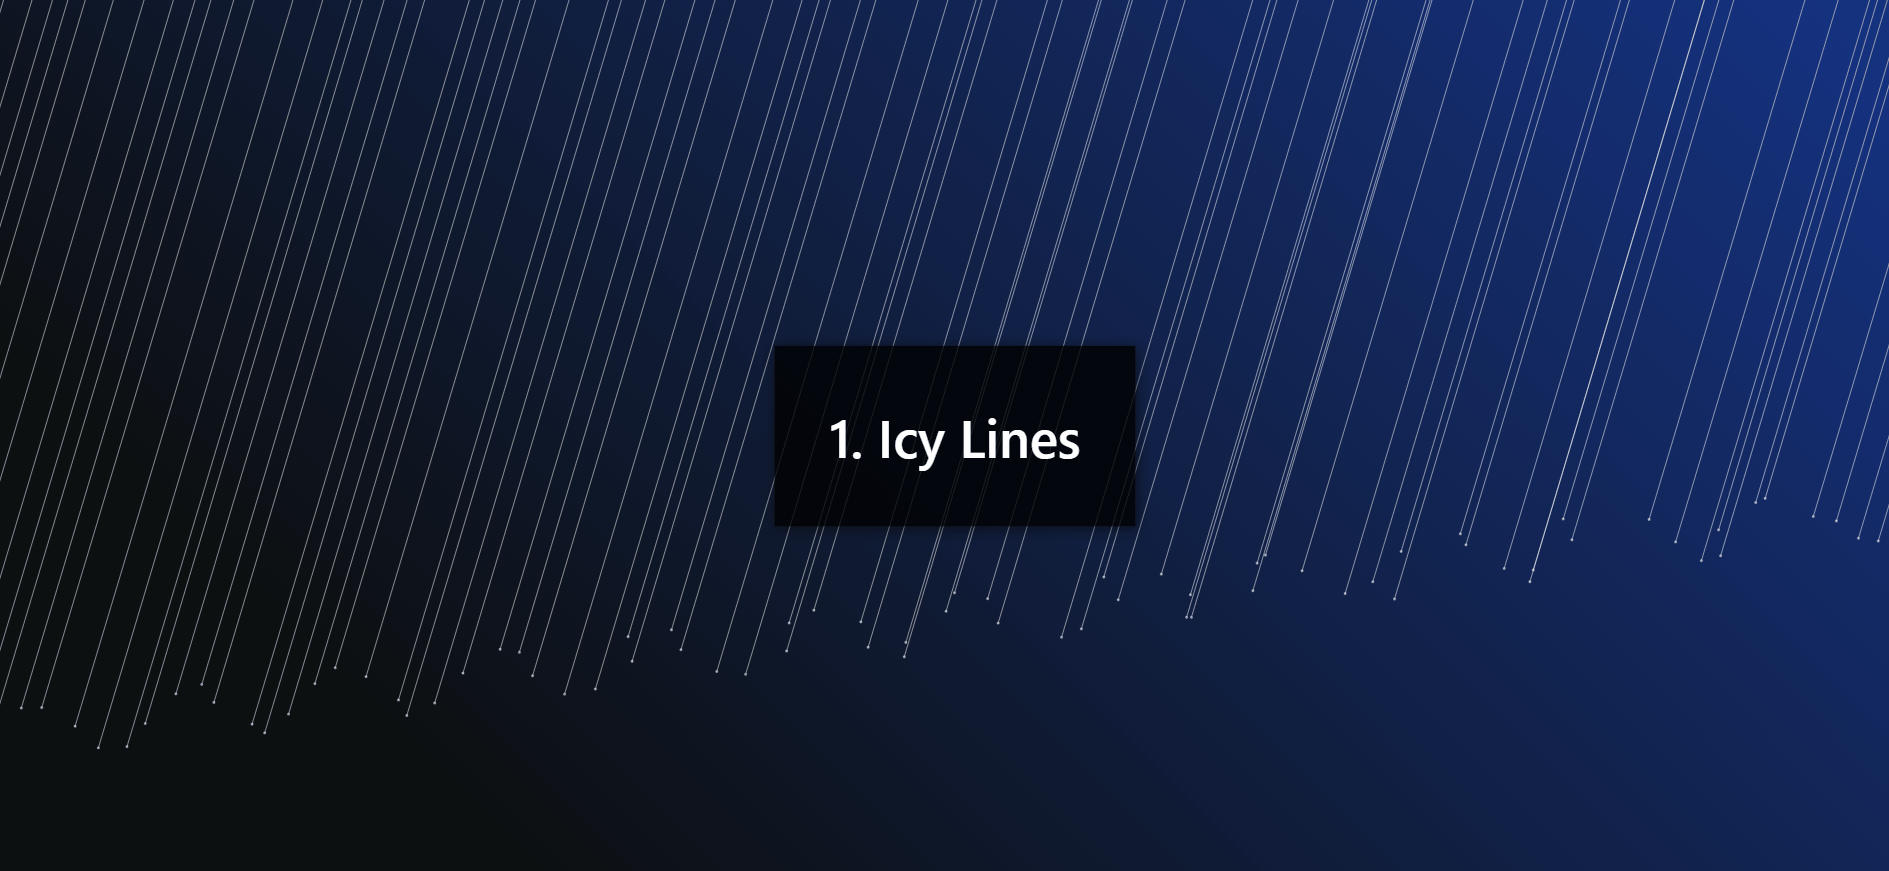
Project 1: Icy Lines
See the Pen Icy Lines by Bret Cameron (@BretCameron) on CodePen.
For best results, open in full screen
First, our lines are white, so let’s go into our CSS and give the canvas a dark background:
canvas {
  background: linear-gradient(45deg, #0d1011 0% 20%, #163486);
}
Line Constructor
Now back to canvas.js. Let’s create a new Line class:
class Line {
  constructor(x, y, offset) {
    this.x = x;
    this.y = y;
    this.offset = offset;
    this.radians = 0;
    this.velocity = 0.01;
  }
}
Apart from determining each line’s x and y position, we have a few other properties to make our visuals more interesting:
- We can use the
offsetproperty to render the lines at varying distances from one another. - We’re also going to be using circular motion in our example. We can use the
radiansproperty to define the angle of motion and thevelocityproperty to determine the speed of movement.
Line Draw Method
Next, we’ll want to draw our lines. There’s a small circle at the bottom of each line, which we can define using the arc function, and then the line shoots off to the top of the screen:
class Line {
  constructor(x, y, offset) {
    this.x = x;
    this.y = y;
    this.offset = offset;
    this.radians = 0;
    this.velocity = 0.01;
  }

  draw = () => {
    c.strokeStyle = "rgba(255, 255, 255, 0.5)";
    c.fillStyle = "rgba(255, 255, 255, 0.3)";
    c.beginPath();
    c.arc(this.x, this.y, 1, 0, Math.PI * 2, false);
    c.fill();
    c.moveTo(this.x, this.y);
    c.lineTo(this.x + 300, this.y - 1000);
    c.stroke();
    c.closePath();
    this.update();
  };

  update = () => {
    // this is where we control movement and interactivity
  };
}
To test that it’s working, you can create a sample line:
const line = new Line(250, 800, 0);
line.draw();
Generating 100 Lines
But we want lines to fill the screen, so we’ll need to a way to create an array of 100 lines. Here’s a simple version:
const lineArray = [];

for (let i = 0; i < 100; i++) {
  const start = { x: -250, y: 800 };
  const unit = 25;

  lineArray.push(new Line(start.x + unit * i, start.y + i * -3, 0.1 + 1 * i));
}
To view these lines, we’ll need to trigger their draw methods. As we’ll soon be animating them, the best place to do that is in the animate function:
function animate() {
  requestAnimationFrame(animate);
  c.clearRect(0, 0, window.innerWidth, window.innerHeight);

  lineArray.forEach((line) => {
    line.draw();
  });
}

animate();
We now have 100 lines! But we can make our starting position more interesting: in the code below, the random variable helps provide subtle variation which gives the overall effect a more natural look. (I’m also using Math.sin(i) to add some waviness into the starting positions. This isn’t necessary, but it’s a nice touch.)
const lineArray = [];

for (let i = 0; i < 100; i++) {
  const start = { x: -250, y: 800 };
  const random = Math.random() - 0.5;
  const unit = 25;
  lineArray.push(
    new Line(
      start.x + (unit + random) * i,
      start.y + (i + random) * -3 + Math.sin(i) * unit,
      0.1 + 1 * i
    )
  );
}
Play around with the numbers until you have a starting pattern that you like!
Animation
From here, it’s very simple to add the animation we want. Go back to our Line class, and then add the following in the update method:
this.radians += this.velocity;
this.y = this.y + Math.cos(this.radians + this.offset);
With every animation frame, this.radians will increase by this.velocity. We’ll then use this.radians to create circular motion, via Math.cos.
If you haven’t encountered Math.sin or Math.cos before (or your trigonometry is a bit rusty!), that shouldn’t stop you following along. Just know that Math.cos allows us to create back-and-forth motion, in a pattern identical to the purple line in the graph below:
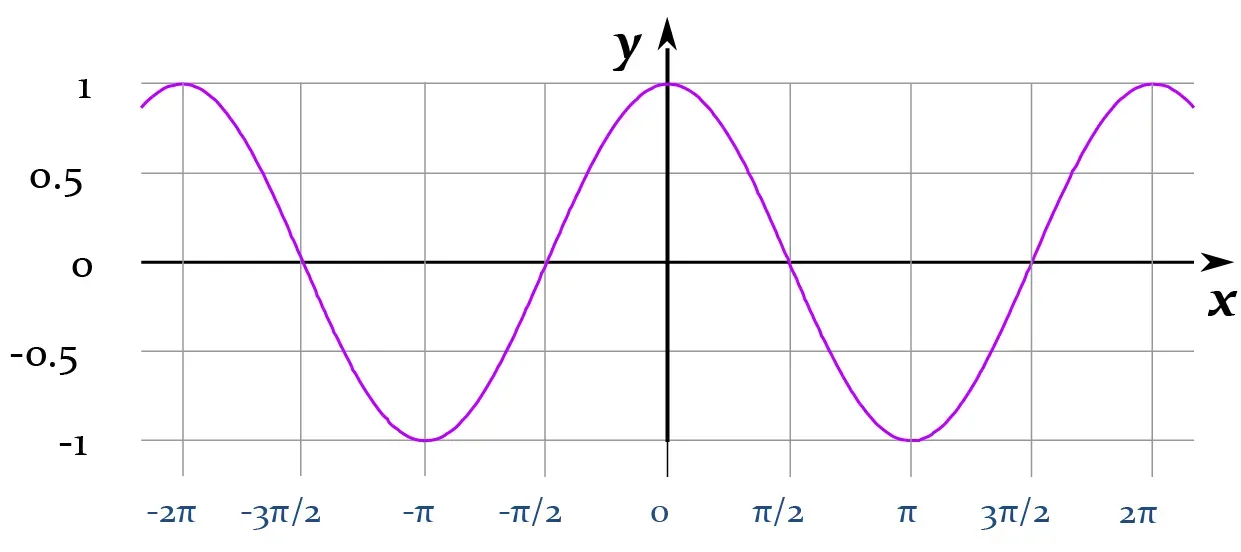
Lastly, by adding this.offset, the lines will begin looping at different angles.
I think this is a pretty nice effect. But for a finishing touch, let’s add some interactivity. When the user hovers over the lines, let’s make them change colour.
Interactivity
The simplest way to see whether the user’s mouse is over one of the lines is to use canvas’s built-in isPointInPath method.
But, without any further tweaks, this isn’t going to be much use. The lines are only 1 pixel wide, so the chance of triggering any changes will be too low to be interesting!
A great solution to this problem is to create invisible lines behind each of our lines. The invisible lines should be wider, and we can use these to trigger isPointInPath.
isPointInPath
Inside our draw method, let’s create a function called drawLinePath. It should take a width for our invisible lines, and a color (which our visible lines will become, when the invisible lines are in contact):
const drawLinePath = (width = 0, color) => {
  c.beginPath();
  c.moveTo(this.x - width / 2, this.y + width / 2);
  c.lineTo(this.x - width / 2 + 300, this.y - width / 2 - 1000);
  c.lineTo(this.x + width / 2 + 300, this.y - width / 2 - 1000);
  c.lineTo(this.x + width / 2, this.y - width / 2);
  c.closePath();
  if (c.isPointInPath(mouse.x, mouse.y) && color) {
    c.strokeStyle = color;
  }
};
(Note that the use of arrow functions above implicitly binds the correct context for this ).
We can then easily add different widths of invisible lines to trigger different colour changes. The following code should make clear what’s going on:
drawLinePath(150, "red");
drawLinePath(50, "yellow");
But, for a more subtle effect, try:
drawLinePath(150, "#baf2ef");
drawLinePath(50, "#dcf3ff");
And that’s a wrap!
Here’s the complete JavaScript code:
const cvs = document.querySelector("canvas");
const c = cvs.getContext("2d");

cvs.width = window.innerWidth;
cvs.height = window.innerHeight;

window.addEventListener("resize", function () {
  cvs.width = window.innerWidth;
  cvs.height = window.innerHeight;
});

let mouse = {
  x: undefined,
  y: undefined,
};

window.addEventListener("mousemove", function (e) {
  mouse.x = event.x;
  mouse.y = event.y;
});

class Line {
  constructor(x, y, offset) {
    this.x = x;
    this.y = y;
    this.offset = offset;
    this.radians = 0;
    this.velocity = 0.01;
  }

  draw = () => {
    c.strokeStyle = "rgba(255, 255, 255, 0.5)";
    c.fillStyle = "rgba(255, 255, 255, 0.3)";

    const drawLinePath = (width = 0, color) => {
      c.beginPath();
      c.moveTo(this.x - width / 2, this.y + width / 2);
      c.lineTo(this.x - width / 2 + 300, this.y - width / 2 - 1000);
      c.lineTo(this.x + width / 2 + 300, this.y - width / 2 - 1000);
      c.lineTo(this.x + width / 2, this.y - width / 2);
      c.closePath();
      if (c.isPointInPath(mouse.x, mouse.y) && color) {
        c.strokeStyle = color;
      }
    };

    drawLinePath(150, "#baf2ef");
    drawLinePath(50, "#dcf3ff");

    c.beginPath();
    c.arc(this.x, this.y, 1, 0, Math.PI * 2, false);
    c.fill();
    c.moveTo(this.x, this.y);
    c.lineTo(this.x + 300, this.y - 1000);
    c.stroke();
    c.closePath();

    this.update();
  };

  update = () => {
    this.radians += this.velocity;
    this.y = this.y + Math.cos(this.radians + this.offset);
  };
}

const lineArray = [];

for (let i = 0; i < 100; i++) {
  const start = { x: -250, y: 800 };
  const random = Math.random() - 0.5;
  const unit = 25;

  lineArray.push(
    new Line(
      start.x + (unit + random) * i,
      start.y + (i + random) * -3 + Math.sin(i) * unit,
      0.1 + 1 * i
    )
  );
}

function animate() {
  requestAnimationFrame(animate);
  c.clearRect(0, 0, window.innerWidth, window.innerHeight);
  lineArray.forEach((line) => {
    line.draw();
  });
}

animate();
Project 2: Expanding Diamonds
See the Pen Expanding Diamonds by Bret Cameron (@BretCameron) on CodePen.
For best results, open in full screen
For this example, let’s use a different background for our canvas:
canvas {
  background: linear-gradient(-135deg, #008b8b, #000);
}
Diamond Constructor
Head back to canvas.js. This time, we’ll be creating a Diamond class. Our constructor will be similar to the previous one, with some new additions:
- we want to randomize the
widthandcolorof each diamond, so need to specify those properties - we also want to control the x-velocity (
dx) and y-velocity (dy) separately - and, as our diamonds will be growing and shrinking, it’s useful to set limitations on their maximum and minimum size, using
maxWidthandmindWidth
class Diamond {
  constructor(x, y, dx, dy, width) {
    this.x = x;
    this.y = y;
    this.dx = dx;
    this.dy = dy;
    this.width = width;
    this.minWidth = width;
    this.maxWidth = width * 3;

    let colorArray = ["#de3d3d", "#090c0b", "#0d2527", "#267368", "#00b1a0"];

    this.color = colorArray[Math.floor(Math.random() * colorArray.length)];
  }
}
Diamond Draw Method
We could draw our diamonds as rectangles and then rotate them. But, it’s a little easier draw the diamonds as a path, because we can ensure that this.x and this.y represent the centre of the diamond, rather than its starting point.
Inside the Diamond class, add the following draw method:
draw = () => {
  c.beginPath();
  c.moveTo(this.x, this.y);
  c.lineTo(this.x - this.width / 2, this.y);
  c.lineTo(this.x, this.y + this.width / 2);
  c.lineTo(this.x + this.width / 2, this.y);
  c.lineTo(this.x, this.y - this.width / 2);
  c.lineTo(this.x - this.width / 2, this.y);
  c.closePath();
  c.fillStyle = this.color;
  c.fill();
  this.update();
};
Generating 400 Diamonds
For this example, we’ll generate 400 diamonds, each with a random width, position and velocity:
let diamondArray = [];

for (let i = 0; i < 400; i++) {
  let width = Math.random() * 20 + 4;
  let x = Math.random() * window.innerWidth;
  let dx = (Math.random() - 0.5) * 1;
  let y = Math.random() * window.innerHeight;
  let dy = (Math.random() - 0.5) * 1;

  diamondArray.push(new Diamond(x, y, dx, dy, width));
}
Note that we’re using Math.random() to generate velocities which could be positive or negative.
Let’s update our animate function to see the diamonds we’ve just made:
function animate() {
  requestAnimationFrame(animate);
  c.clearRect(0, 0, window.innerWidth, window.innerHeight);

  diamondArray.forEach((diamond) => {
    diamond.draw();
  });
}

animate();
Animation
The animation for this example is a tad trickier than in the last example. We could simply apply the initial velocity inside our update method, like so:
this.x += this.dx;
this.y += this.dy;
But after a while, all the diamonds will have flown off the screen. To keep them inside the viewport, we need to change the velocity from positive to negative (and vice versa) when each diamond hits the outer bounds of our window.
update = () => {
  if (
    this.x + this.width / 2 >= window.innerWidth ||
    this.x - this.width / 2 <= 0
  ) {
    this.dx = -this.dx;
  }

  if (
    this.y + this.width / 2 >= window.innerHeight ||
    this.y - this.width / 2 <= 0
  ) {
    this.dy = -this.dy;
  }

  this.x += this.dx;
  this.y += this.dy;
};
Now, none of our diamonds will go out of view!
Interactivity
The final piece of the puzzle is to add interactivity. When the diamonds come within range of our current mouse position, they should grow. And when they go out of range, they should shrink back to their original size.
Similar to the animation, this can be achieved with conditionals. The following code (which should go inside the update) function) triggers the diamonds to enlarge when they’re within a range of 160 pixels from the mouse:
if (
  mouse.x - this.x < 80 &&
  mouse.x - this.x > -80 &&
  mouse.y - this.y < 80 &&
  mouse.y - this.y > -80 &&
  this.width < this.maxWidth
) {
  this.width += 1;
  this.x -= 1;
  this.y -= 1;
}
Then this else if statement shrinks the diamonds back to their original size, when they’re out of range:
else if (this.width > this.minWidth) {
  this.width -= 1;
  this.x += 1;
  this.y += 1;
}
And we’re done!
Here’s the complete JavaScript code:
const cvs = document.querySelector("canvas");
const c = cvs.getContext("2d");

cvs.width = window.innerWidth;
cvs.height = window.innerHeight;

window.addEventListener("resize", function () {
  cvs.width = window.innerWidth;
  cvs.height = window.innerHeight;
});

let mouse = {
  x: undefined,
  y: undefined,
};

window.addEventListener("mousemove", function (e) {
  mouse.x = event.x;
  mouse.y = event.y;
});

class Diamond {
  constructor(x, y, dx, dy, width) {
    this.x = x;
    this.y = y;
    this.dx = dx;
    this.dy = dy;
    this.width = width;
    this.minWidth = width;
    this.maxWidth = width * 3;

    let colorArray = ["#de3d3d", "#090c0b", "#0d2527", "#267368", "#00b1a0"];

    this.color = colorArray[Math.floor(Math.random() * colorArray.length)];
  }

  draw = () => {
    c.beginPath();
    c.moveTo(this.x, this.y);
    c.lineTo(this.x - this.width / 2, this.y);
    c.lineTo(this.x, this.y + this.width / 2);
    c.lineTo(this.x + this.width / 2, this.y);
    c.lineTo(this.x, this.y - this.width / 2);
    c.lineTo(this.x - this.width / 2, this.y);
    c.closePath();

    c.fillStyle = this.color;
    c.fill();

    this.update();
  };

  update = () => {
    if (
      this.x + this.width / 2 >= window.innerWidth ||
      this.x - this.width / 2 <= 0
    ) {
      this.dx = -this.dx;
    }

    if (
      this.y + this.width / 2 >= window.innerHeight ||
      this.y - this.width / 2 <= 0
    ) {
      this.dy = -this.dy;
    }

    this.x += this.dx;
    this.y += this.dy;

    // interactivity
    if (
      mouse.x - this.x < 80 &&
      mouse.x - this.x > -80 &&
      mouse.y - this.y < 80 &&
      mouse.y - this.y > -80 &&
      this.width < this.maxWidth
    ) {
      this.width += 1;
      this.x -= 1;
      this.y -= 1;
    } else if (this.width > this.minWidth) {
      this.width -= 1;
      this.x += 1;
      this.y += 1;
    }
  };
}

let diamondArray = [];

for (let i = 0; i < 400; i++) {
  let width = Math.random() * 20 + 4;
  let x = Math.random() * window.innerWidth;
  let dx = (Math.random() - 0.5) * 1;
  let y = Math.random() * window.innerHeight;
  let dy = (Math.random() - 0.5) * 1;
  diamondArray.push(new Diamond(x, y, dx, dy, width));
}

function animate() {
  requestAnimationFrame(animate);
  c.clearRect(0, 0, window.innerWidth, window.innerHeight);

  diamondArray.forEach((diamond) => {
    diamond.draw();
  });
}

animate();
Conclusion
If you’re new to HTML5 canvas, I hope this article opened your eyes to some of the possibilities.
If you’d like to learn more, MDN has some great resources on canvas, such as this introduction to canvas animations.
Or, if you’re an audio-visual learner, there are some fantastic YouTube tutorials by Chris Courses, and Chris’s approach also inspired my second example ‘Expanding Diamonds’.
Related articles
You might also enjoy...

Switching to a New Data Structure with Zero Downtime
A Practical Guide to Schema Migrations using TypeScript and MongoDB
7 min read
Feb 2025
How to Automate Merge Requests with Node.js and Jira
A quick guide to speed up your MR or PR workflow with a simple Node.js script
7 min read
Nov 2024
Automate Your Release Notes with AI
How to save time every week using GitLab, OpenAI, and Node.js
11 min read
Nov 2024